

Introduction
Nobody thinks about a bathroom sink drain until the water slows down, the cabinet floor feels damp, or a smell shows up out of nowhere. It is a small assembly with a big job: it carries water away, seals out sewer gas, and quietly decides whether your vanity stays dry.
This guide walks you from understanding the drain to choosing, cleaning, fixing, and replacing it. It also covers details most guides skip, like how to tell which drain you own, what to do when a flange just spins, and what a repair actually costs. At My Home Improve Ideas, we keep the advice practical and tell you plainly when a job belongs to a licensed plumber.
Why Is the Bathroom Sink Drain Important?
Short answer: The drain removes wastewater, blocks sewer gas with a water seal, and keeps leaks out of your cabinet, so a small failure can turn into water damage.
Most bathroom sink drain problems start small. A worn washer drips a few drops a day, and the cabinet floor slowly swells. A dry trap lets odor into the room. A hair-clogged stopper makes you wait on every rinse.
The fix is usually simple when you catch it early. That is why knowing the parts, and what normal looks like, is genuinely worth ten minutes.
| Drain Type | How It Works | Best For | Main Drawback |
|---|---|---|---|
| Pop-up with lift rod | A rod behind the faucet moves the stopper through a pivot rod and strap | Traditional bathrooms, easy soaking | More parts to align and adjust |
| Push pop-up | Press the cap to close, press again to open | Modern baths, one-hand use | Needs cleaning under the cap |
| Grid or strainer | Fixed grate that stays open | Kids' baths, guest baths, hair control | Cannot hold water in the basin |
| Lift and turn | Twist the knob to raise or seal the stopper | Simple, durable replacements | Slower to use every day |
Bathroom Sink Drain Types, Parts, and Fixes
Here is how to work through it in order, from identifying what you have to knowing when to call for help.
1. Know Which Drain You Have in 60 Seconds
Short answer: Look at how the stopper is controlled, because the control tells you the drain type and how to remove it for cleaning.
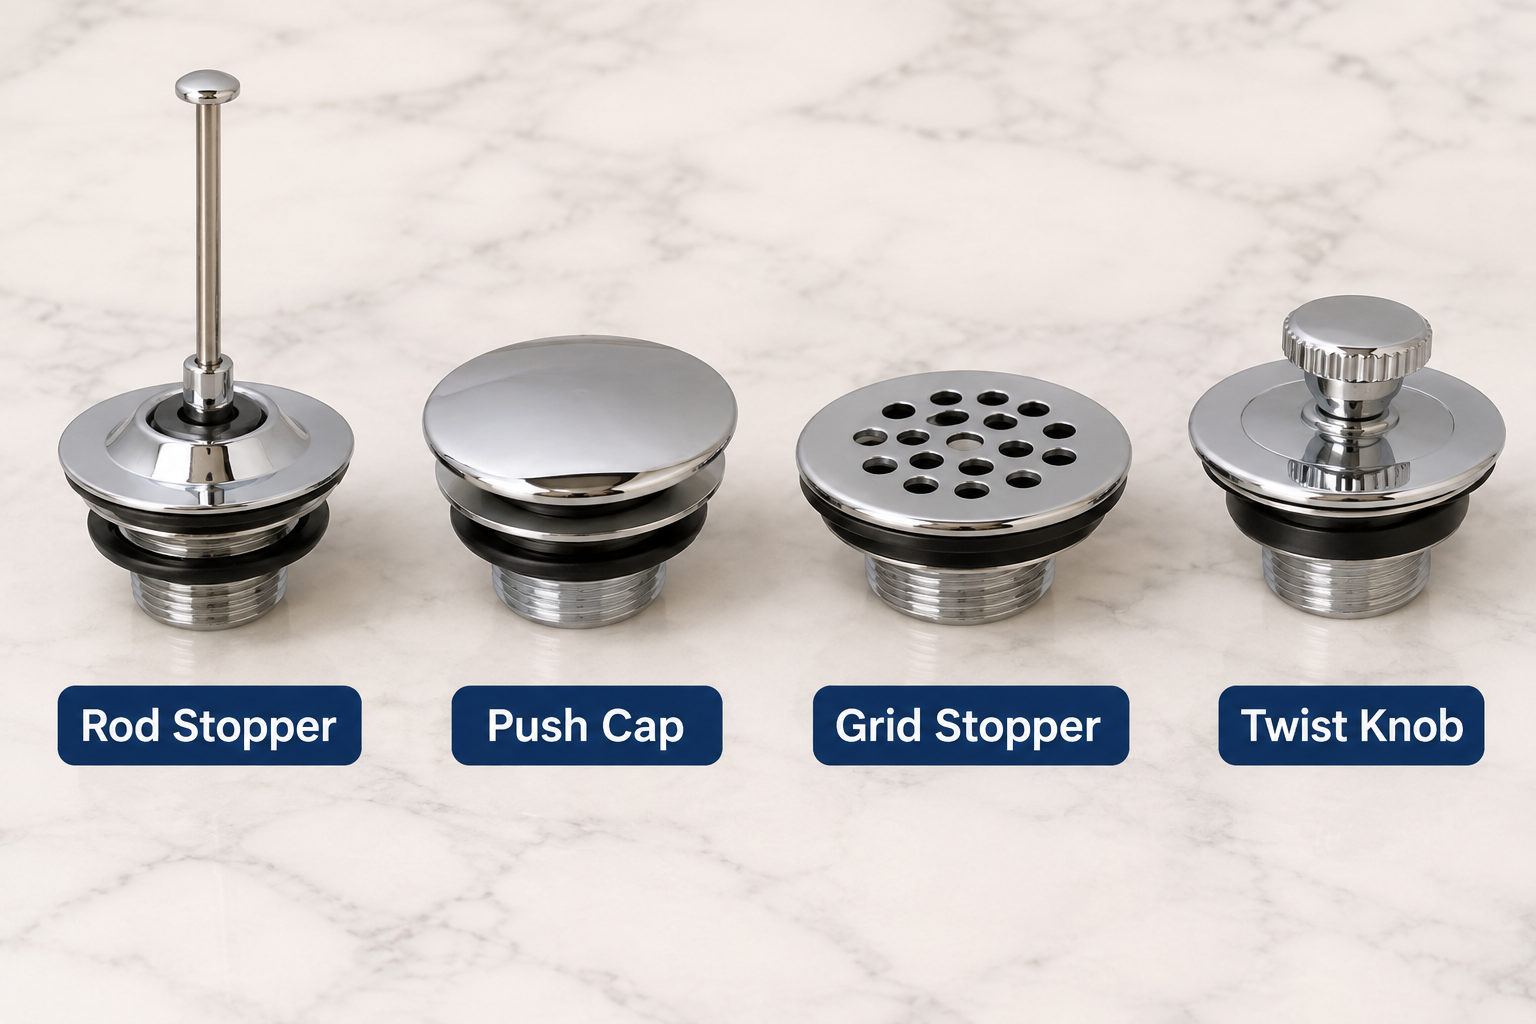
The way the stopper is controlled reveals the drain type.
Replacement and repair both start here. Buying the wrong pop-up drain or stopper is the most common reason a project stalls halfway.
| What You See | Drain Type | How to Remove the Stopper |
|---|---|---|
| A rod behind the faucet | Pop-up with lift rod | Loosen the pivot rod nut under the drain, free the rod from the strap, then lift the stopper |
| A flat cap you press | Push pop-up | Unscrew the cap by hand, or lift it straight up on many models |
| A fixed grate, nothing moves | Grid drain | Lift or unscrew the top, depending on the model |
| A knob you twist | Lift and turn | On most models, unscrew the knob and stem counterclockwise |
If you cannot identify it, take two photos, one from above and one under the sink, before you shop.
2. Learn the Sink Drain Parts From the Basin Down
Short answer: A bathroom sink drain is a chain of parts: flange, stopper, drain body, tailpiece, and trap, each sealed with a gasket or washer.
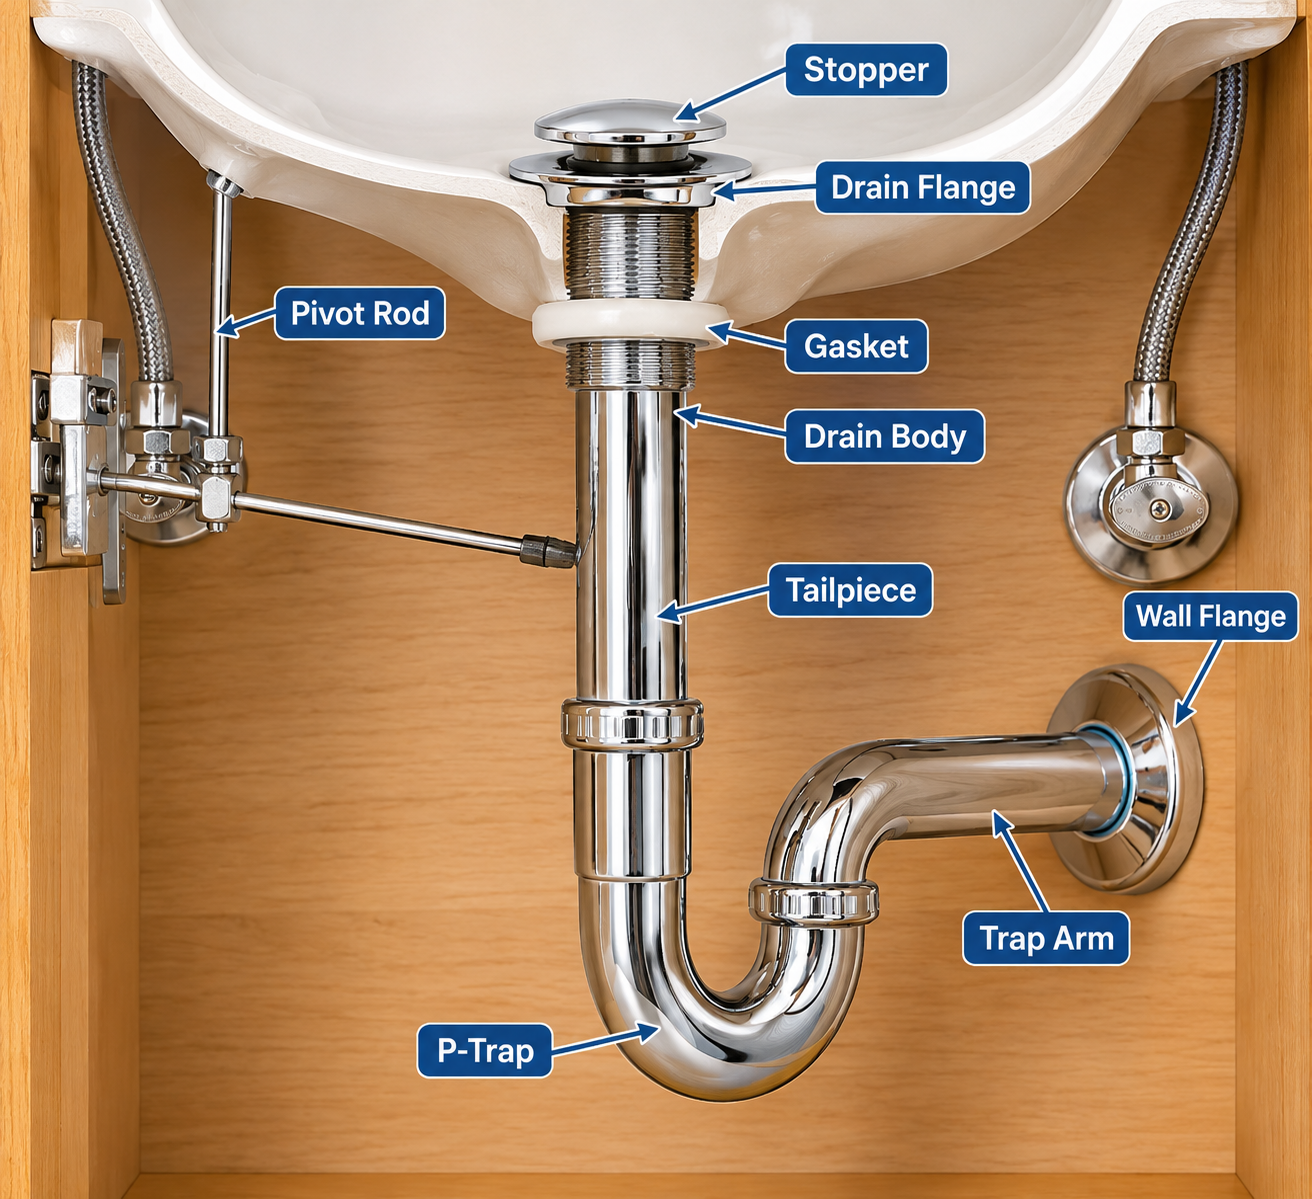
Every connection in the chain is a possible leak point.
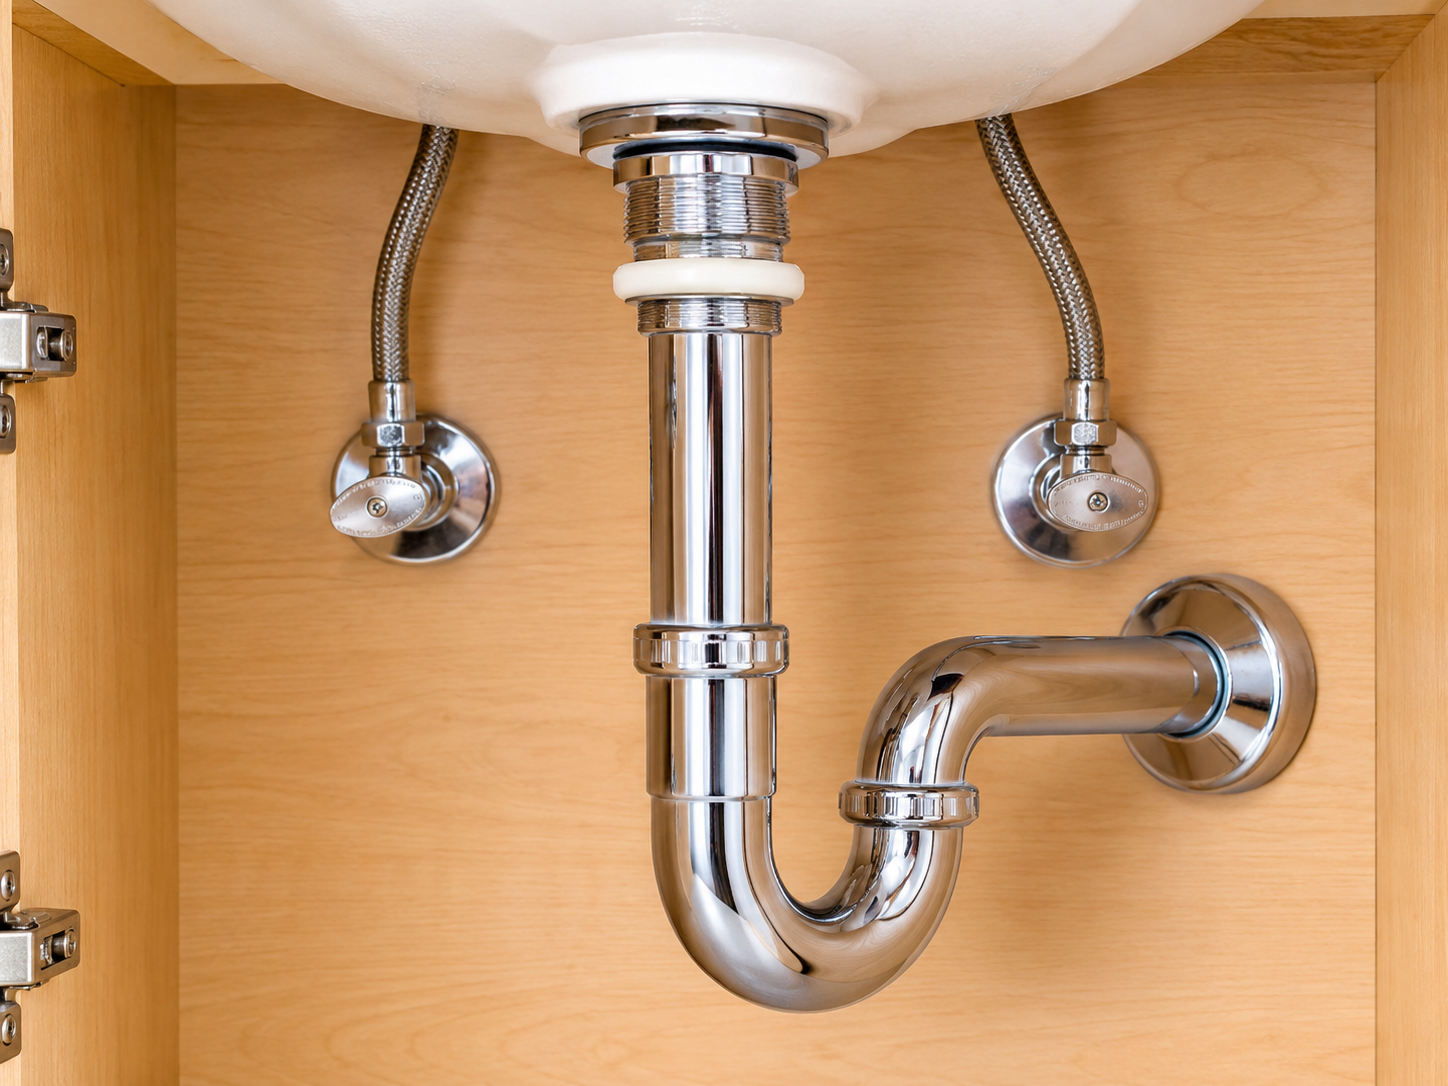
Knowing the sink drain parts by name makes diagnosing a leak much easier:
- Flange: the visible ring at the bottom of the basin. It seals the sink opening.
- Stopper: opens and closes the drain, or is replaced by a grate.
- Drain body: the threaded piece under the sink, with a rubber gasket and a locknut holding it tight.
- Pivot rod, clevis strap, and lift rod: the linkage on a rod-style drain.
- Tailpiece: the straight pipe that drops from the drain body.
- P-trap: the curved pipe that holds a small plug of water. That water is what blocks sewer gas.
- Trap arm: the pipe that connects the trap to the wall drain.
The P-trap is not a design flaw, even though it collects hair. It is the reason your bathroom does not smell like a sewer.
3. Match the Drain to Your Sink: Size, Overflow, and Finish
Short answer: Check three things before you buy: the sink hole size, the tailpiece diameter, and whether your sink has an overflow.
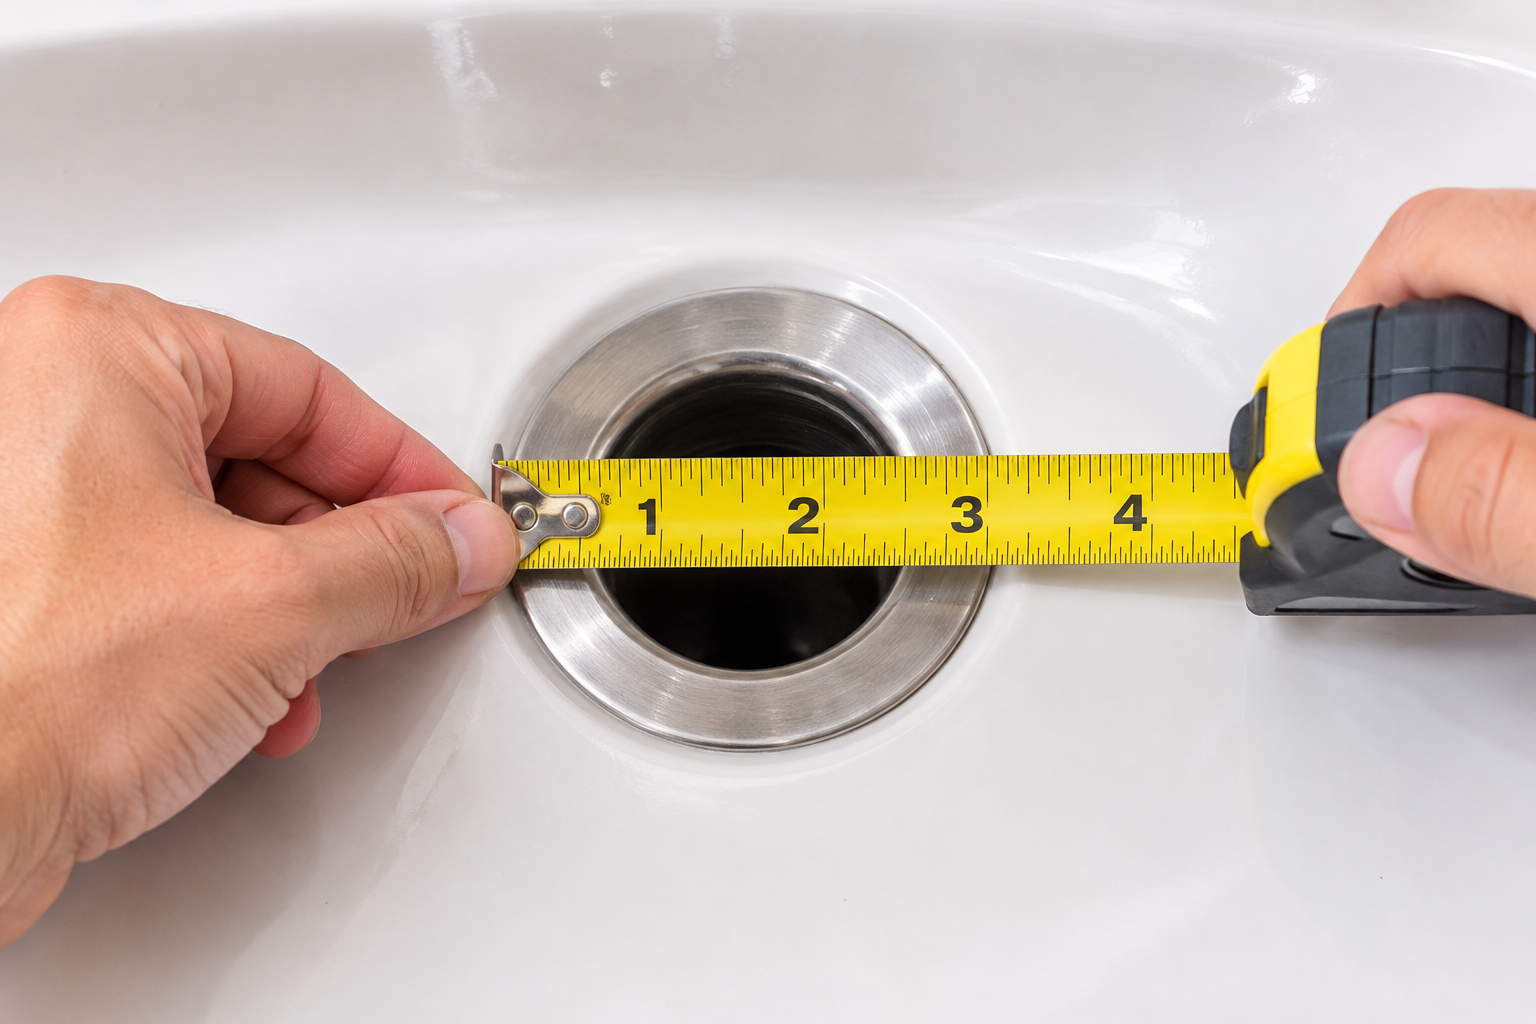
Three quick measurements prevent most wrong-part returns.
The usual bathroom sink drain size is a sink hole of about 1 5/8 inches with a 1 1/4 inch tailpiece. Plumbing codes generally call for at least 1 1/4 inch for a lavatory drain, but check your local code. The wall pipe is often 1 1/2 inch, so a reducing washer is common at that joint.
Next, look near the rim for a small slot or hole. That is the overflow, and it needs a drain body with side holes that line up with it. Many vessel sinks have no overflow, so they need a solid body with no holes. Mixing them up causes gurgling and slow drainage. If you are unsure which type of basin you own, the bathroom vanity with sink buying guide shows how common basin styles differ.
Finish matters too, but it is a design choice, not a plumbing one. Matte black looks sharp in modern bathroom ideas, though it shows soap film faster than brushed nickel. Solid brass bodies tend to hold threads and seals longer than plastic, while plastic costs less and will not corrode.
4. Fix the Most Common Drain Problems
Short answer: Most problems trace to hair buildup, a worn gasket, or a misadjusted stopper, and you can fix them with basic tools in under an hour.
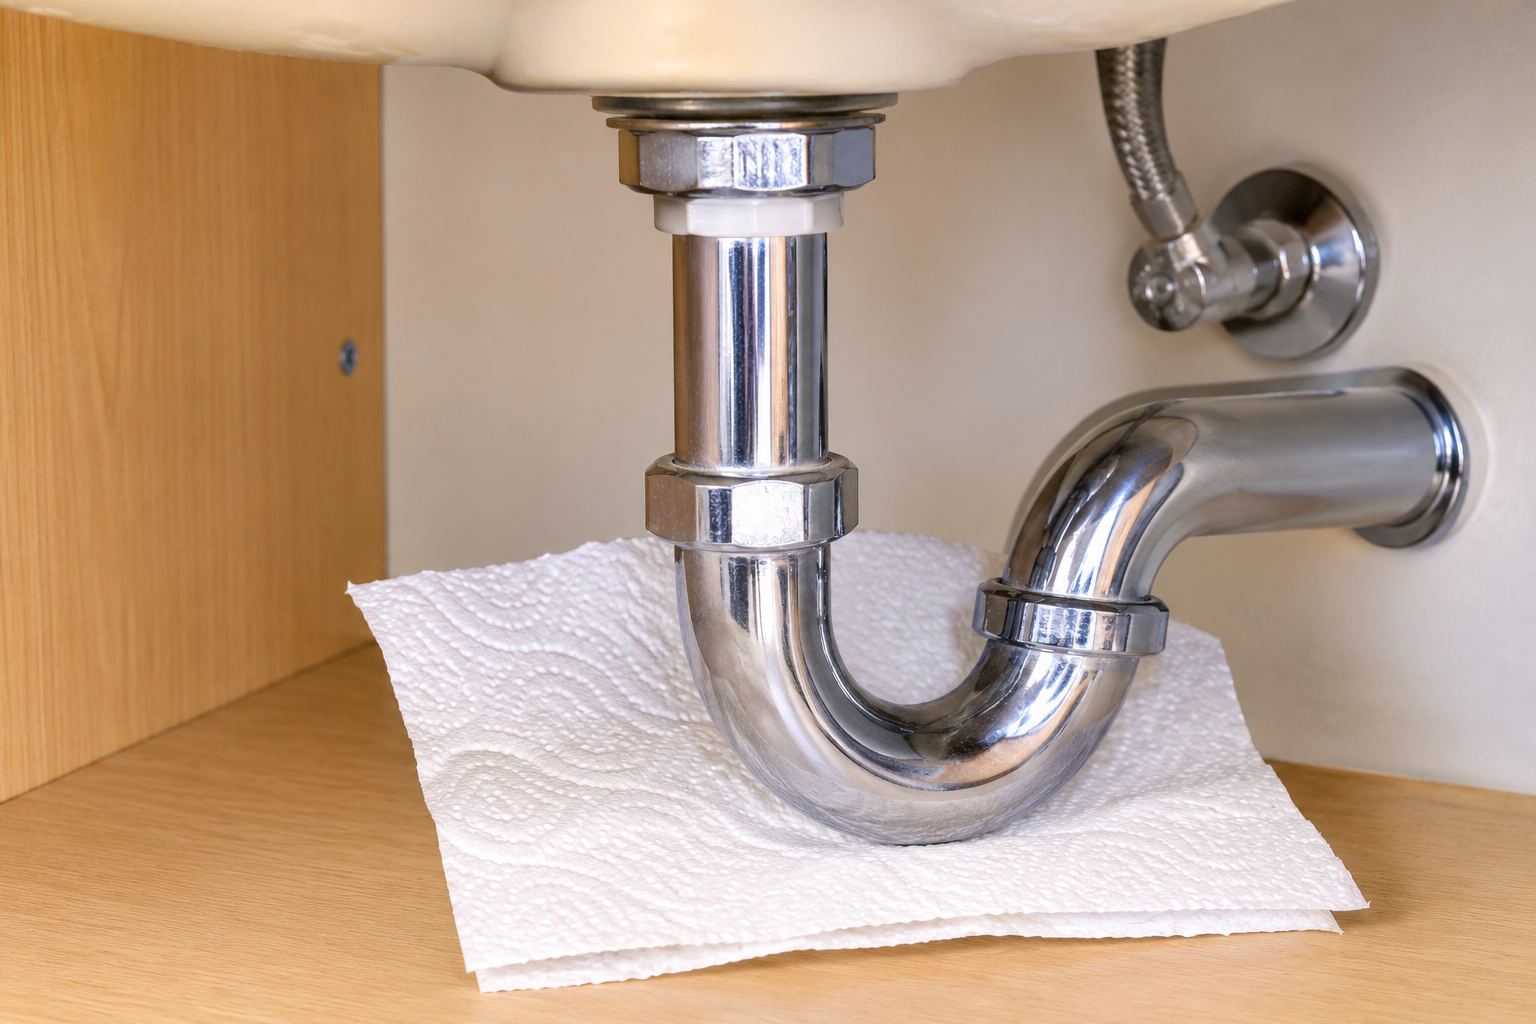
A dry paper towel under each joint shows exactly which one is leaking.
Leaks are easier to trace than they look. Wipe every joint dry, place a paper towel under each one, and run the water. The towel that gets wet points to the culprit. Picture a homeowner who mops a damp cabinet floor for weeks and blames the faucet, when the real cause is a pivot rod nut that has worked loose. This test would have found it in two minutes.
If you have a double sink bathroom vanity, each basin gets its own drain, and both often feed one wall pipe. Test each side separately, because a leak on one basin can drip onto the other's parts.
A bathroom sink clog that comes back every few weeks is a signal, not a nuisance. It usually means buildup deeper in the trap, or an alignment issue, not just a dirty stopper.
5. Clean Your Drain Safely Without Harsh Chemicals
Short answer: Weekly wiping and a monthly flush prevent most clogs, and mechanical cleaning with a hair tool is safer than chemical drain cleaners.
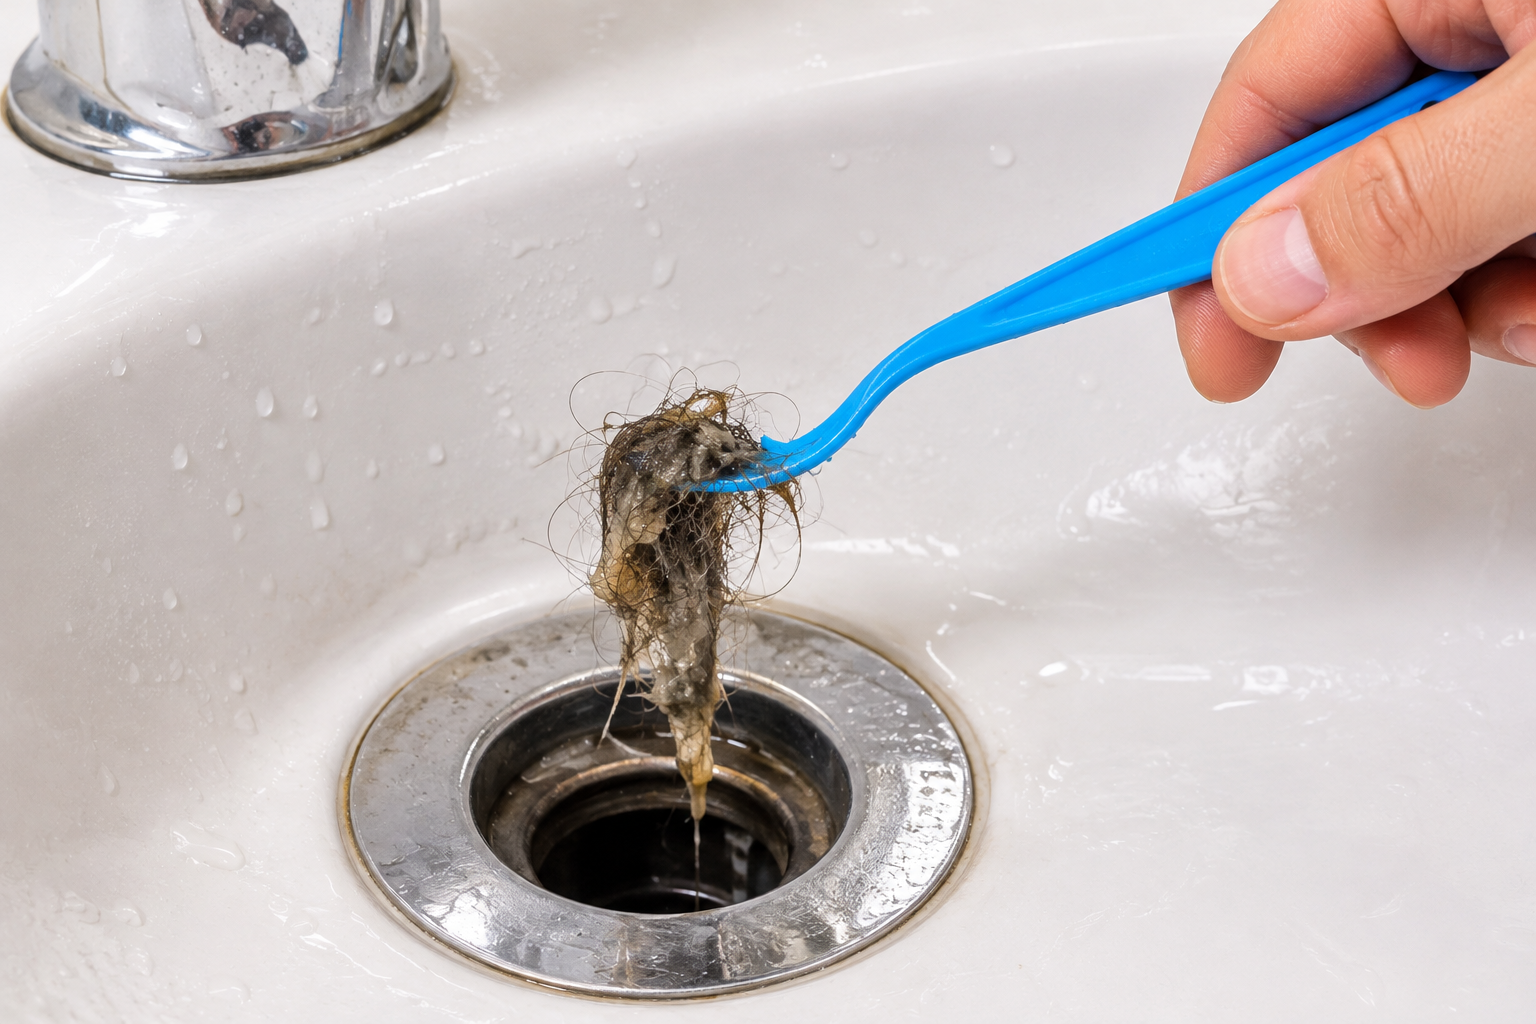
A plastic hair tool removes what chemicals often cannot.
A simple routine keeps your bathroom sink drain, the sink drain stopper, and the seat clear:
- Weekly: lift the stopper or grid and wipe off hair and soap film.
- Monthly: flush with hot tap water, and scrub the threads and seat with a soft brush.
- When it slows down: pull debris out by hand or with a plastic hair tool before reaching for anything stronger.
Safety first. Wear gloves and eye protection when you handle drain cleaners or open a trap. Never mix cleaning products, especially bleach with ammonia or acids, because the fumes are dangerous. Chemical cleaners can also damage some finishes, plastic parts, and older pipes, and they are risky if you later need to open a trap full of caustic water. Use hot tap water rather than boiling water, which can soften plastic fittings and stress porcelain.
Baking soda and vinegar are gentle, but they rarely clear a real hair clog. Treat them as upkeep, not a repair.
6. Replace a Bathroom Sink Drain in About an Hour
Short answer: A straightforward swap takes 45 to 90 minutes if you buy the right parts, seal the flange properly, and test for leaks before closing the cabinet.
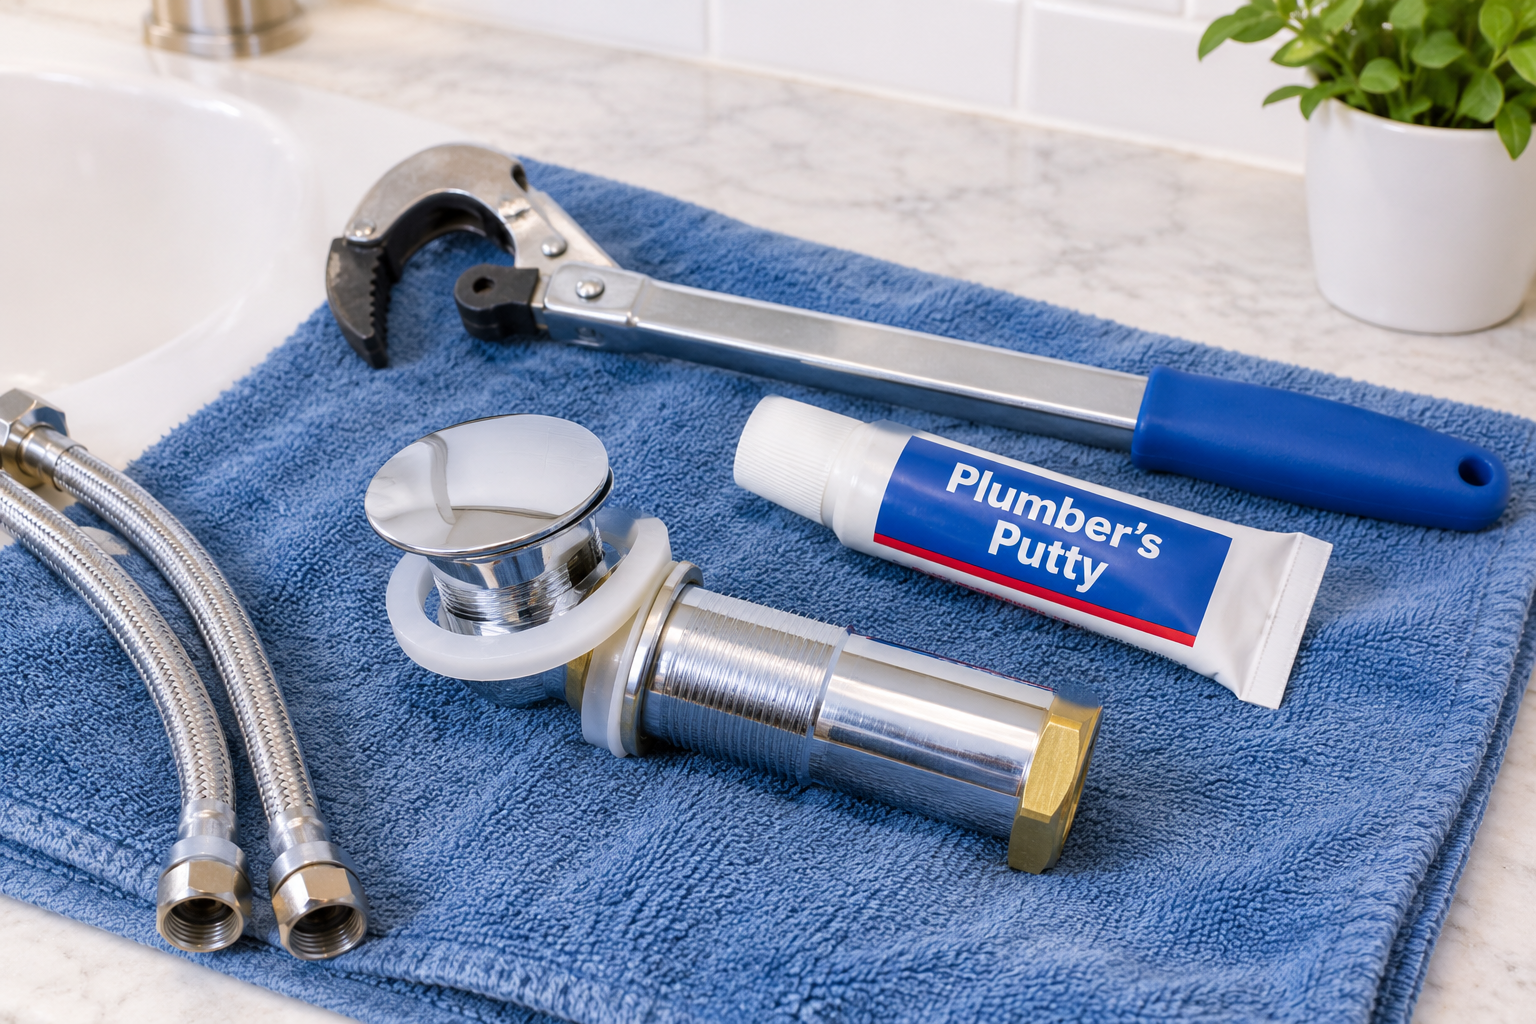
Laying out your parts first saves the most time.
Planning matters more than skill here. A tight vanity, like a compact single sink bathroom vanity, leaves little elbow room, so clear the cabinet and gather your tools first.
- Prep (10 minutes): clear the cabinet, set a bucket under the trap, and lay down a towel.
- Remove the old drain (15 to 25 minutes): loosen the slip nuts, detach the tailpiece, then unscrew the drain body. If the flange spins, hold it from above with pliers while you loosen the locknut below.
- Clean the sink hole (5 minutes): remove old putty until the surface is bare and dry.
- Seal and set the new flange (10 minutes): apply putty or silicone under the flange, then thread the body on from below.
- Reconnect and test (15 to 20 minutes): attach the tailpiece and trap with the washers seated flat, fill the sink, release it, and check every joint.
Putty or silicone? Follow the drain maker's instructions. As a rule, putty works on porcelain with a metal flange, while silicone is safer for natural stone, composite, and plastic flanges, since putty oils can stain porous stone.
Tighten by hand, then add about a quarter turn with pliers. Overtightening cracks plastic parts and distorts gaskets, which backfires into the very leak you were fixing.
7. Know What It Costs and When to Call a Plumber
Short answer: A professional drain replacement typically runs about $100 to $350, and a DIY swap costs only the parts, so call a plumber when the problem goes beyond the visible drain.
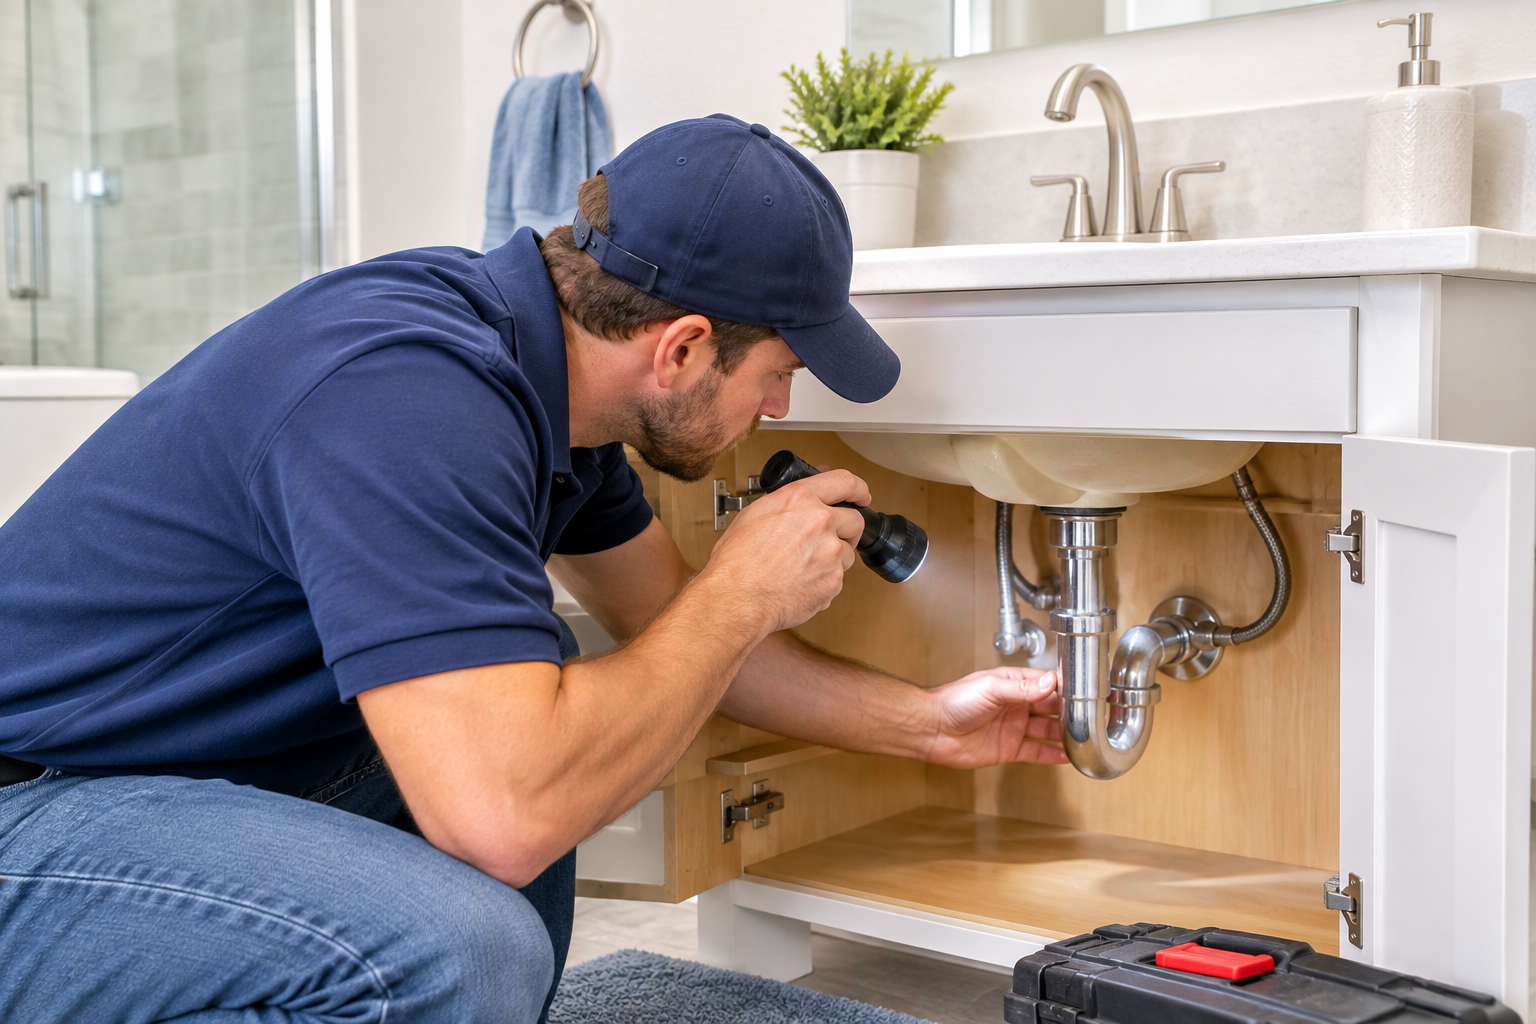
Call a pro when the problem is in the wall, not the drain.
A plumber typically charges about $100 to $350 to replace a sink drain, depending on the quality of the parts, how easy the cabinet is to reach, and local labor rates. Removing an old drain on its own runs about $65 to $155, and it costs more when the parts are corroded or stuck. Replacing a P-trap falls around $97 to $320, depending on the pipe material and how tight the cabinet space is.
These are typical ranges reported by cost guides in 2026, and your area may differ. A basic drain assembly is inexpensive, and prices climb for solid metal builds and specialty finishes.
Call a licensed plumber if you see any of these:
- Gurgling or slow drainage in more than one fixture
- A corroded or loose pipe where it enters the wall
- A cracked sink or drain hole
- Repeated leaks that threaten the cabinet floor
- Any work beyond the trap and tailpiece
If you are already planning a bigger update, replacing the drain while the vanity is open is smart timing. Our bathroom remodel ideas can help you decide what to tackle in the same project.
Frequently Asked Questions
What is a bathroom sink drain?
It is the assembly that carries water from the basin into your home's drain system. It includes the flange, stopper, drain body, tailpiece, and P-trap.
Are bathroom sink drains a standard size?
Mostly. Most use a sink hole of about 1 5/8 inches and a 1 1/4 inch tailpiece. Measure yours before you buy.
Can I replace a bathroom sink drain myself?
Yes, if you have basic tools and the sink and pipes are in good condition. Plan on 45 to 90 minutes.
Why does my sink stopper not hold water?
Usually the pivot rod is sitting in the wrong hole of the clevis strap, or the stopper seal is worn. Adjust the strap first.
How do I get rid of a sewer smell from my sink?
Run water to refill the P-trap, then clean the trap and stopper. If it continues, a plumber should check the venting.
Is it safe to use chemical drain cleaner in a bathroom sink?
Use it with caution. It can damage finishes and plastic parts, and the fumes and splashes are hazardous. Try mechanical cleaning first.
Conclusion
A well-chosen, well-kept bathroom sink drain rarely makes itself known, and that is exactly the goal. Learn what you have, measure before you buy, and clean it on a simple schedule.
When something does go wrong, work from the visible parts down to the trap, test each joint with a paper towel, and call a plumber when the problem leaves the cabinet. Do that, and a leaky or slow drain becomes a manageable afternoon fix.